Introduction
The Beauty and Charm of DIY Wood Home Decor
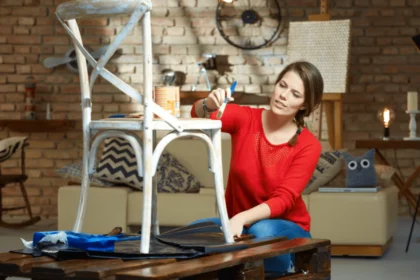
DIY wood home decor combines creativity, affordability, and the warm appeal of natural wood. Crafting your own pieces allows you to infuse your unique style and personality into your living spaces. Whether you’re a seasoned DIY enthusiast or a beginner, the beauty of working with wood lies in its versatility and timeless charm.
Why DIY Wood Decor Is Perfect for Personalizing Your Space
Choosing DIY wood decor enables you to transform your home into a personalized sanctuary. From custom wooden furniture to handcrafted wall art, the possibilities are endless. It’s an opportunity to create one-of-a-kind pieces that reflect your taste and match your home’s aesthetics perfectly.

Essential Tools and Materials
Essential Tools and Materials
Gathering Your DIY Arsenal: Must-Have Tools
Before diving into your DIY wood decor projects, it’s essential to gather the right tools. These must-have tools will not only make your DIY projects easier but also ensure the quality and professionalism of your work.
- Saw: A quality saw is the cornerstone of any woodworking project. A circular saw or a miter saw is excellent for making precise cuts. For small projects, a reliable hand saw will suffice.
- Hammer: A claw hammer is indispensable for driving in nails and securing wooden pieces together. Choose a hammer with the right weight for your comfort.
- Measuring Tape: Precision is key in woodworking. A measuring tape helps ensure accurate measurements, preventing errors and misfits in your projects.
- Sandpaper: Sandpaper in varying grits is vital for smoothing rough edges and achieving a polished finish. Starting with coarse grit and moving to finer grits ensures a smooth surface.
- Wood Clamps: Clamps hold your pieces firmly in place during assembly and gluing. They are essential for ensuring precise joints and preventing movement during the drying process.
- Screwdriver Set: Having a set of screwdrivers with various head types and sizes is crucial for assembling and disassembling wooden parts.
- Wood Glue: A strong, reliable wood glue is indispensable for joining wood pieces securely. Choose a glue suitable for your specific project and wood type.
- Safety Gear: Safety should always be a priority. Include safety glasses, hearing protection, and dust masks in your arsenal to protect your eyes, ears, and respiratory health.
More specialized tools, such as a miter saw, router, or wood stain brushes, become valuable as your skills grow and you undertake more complex projects. Investing in these tools over time can significantly expand your woodworking capabilities.
Choosing the Right Wood for Your DIY Projects
Selecting the appropriate wood is a crucial step in your DIY journey. The type of wood you choose influences the project’s durability, appearance, and ease of working with it.
- Pine: Pine is a popular choice for DIY projects due to its affordability and versatility. It’s relatively soft and easy to work with, making it ideal for beginners.
- Oak: Oak is a hardwood known for its durability and beautiful grain patterns. It’s perfect for furniture and projects requiring strength and longevity.
- Cedar: Cedar is prized for its natural resistance to insects and rot, making it an excellent choice for outdoor projects like garden furniture and fences.
- Plywood: Plywood is a composite material made of thin layers of wood veneer glued together. It’s budget-friendly and suitable for various projects, including cabinetry and shelving.
Understanding the characteristics of different wood species empowers you to make informed choices for your specific projects. Consider factors like grain pattern, hardness, and the wood’s ability to accept stains and finishes when selecting the right wood for your DIY endeavors.
Exploring Finishing Materials and Techniques
Finishing touches make all the difference in your DIY wood decor projects. They not only protect the wood but also enhance its appearance. This section will delve into various finishing materials and techniques:
- Wood Stains: Wood stains enhance the color and grain of the wood. They come in various shades, allowing you to achieve the desired look, from light to dark.
- Paints: For a painted finish, choose high-quality wood paints. Latex and acrylic paints are popular options, providing a smooth, even surface and a wide range of colors.
- Clear Coats: Clear coats, such as polyurethane or lacquer, protect the wood from moisture and wear while giving it a glossy or matte finish.
- Distressing Techniques: If you prefer a rustic or aged appearance, you can distress the wood with techniques like sanding, beating, or using special distressing tools.
- Sleek and Modern Finishes: Achieving a sleek, modern look involves using high-gloss paints and smooth clear coats. This is ideal for contemporary furniture and decor.
By exploring these finishing materials and techniques, you can tailor your DIY wood decor projects to achieve the exact appearance you desire, from rustic and distressed to sleek and modern, giving your projects that professional and polished look.
Easy DIY Wood Decor Projects
Easy DIY Wood Decor Projects
Rustic Wooden Shelves: A Perfect DIY Entry Project
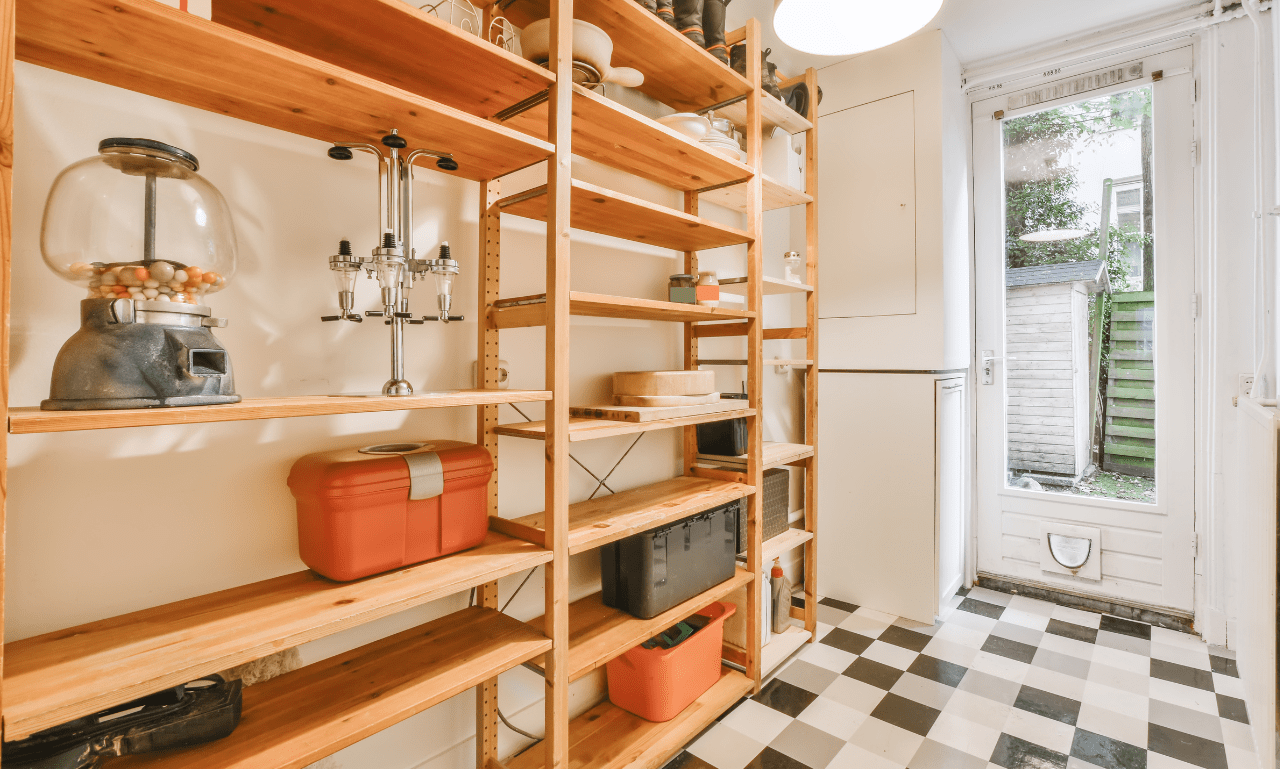
For DIY beginners, embarking on a project to craft rustic wooden shelves is an excellent starting point. This project not only introduces you to the fundamentals of working with wood but also yields practical and stylish storage solutions for your home.
Step 1: Gathering Materials
Begin by gathering your materials. You’ll need wooden boards, brackets, screws, a saw, a drill, and a level. These components are readily available at your local hardware store.
Step 2: Measuring and Cutting
Measure the dimensions of your desired shelves and mark the wooden boards accordingly. Use a saw to make precise cuts. Ensure that the lengths are equal for uniform shelves.
Step 3: Assembling the Shelves
Attach brackets to the wall at the desired height using a level to ensure they’re straight. Then, securely fasten the wooden boards to the brackets using screws.
Step 4: Finishing Touches
If you want to enhance the rustic charm, you can distress the wood by sanding the edges or adding a wood stain for a weathered appearance. Now your rustic wooden shelves are ready to grace your walls, providing a perfect place to display books, plants, or decorative items, and instantly adding character to your home.
Transforming Old Pallets into Stylish Furniture
Upcycling old pallets into chic and functional furniture pieces is a creative and eco-friendly endeavor. It’s not only highly rewarding but also environmentally responsible.
Step 1: Sourcing Pallets
Find old pallets, often available for free or at a minimal cost. Make sure they are in good condition and safe to use.
Step 2: Disassembling and Preparing the Pallets
Carefully disassemble the pallets to obtain individual planks. Clean and sand the planks to remove any rough edges or splinters.
Step 3: Designing Your Furniture
Plan your furniture project. Whether it’s a coffee table, outdoor seating, or a unique storage unit, outline the design and measurements before you begin.
Step 4: Assembling and Finishing
Assemble the furniture pieces by joining the pallet planks using screws or nails. Add finishing touches such as sanding, staining, or painting to achieve the desired look. Your transformed pallet furniture will now take pride of place in your home.
Crafting Wooden Picture Frames: A Personal Touch to Photos
Creating custom wooden picture frames is a delightful way to add a personal touch to your cherished photographs. This DIY project allows you to preserve memories and display them with style.
Step 1: Choosing Wood and Sizing
Select the type of wood you prefer and cut it into four equal-sized pieces for each frame. Ensure the dimensions match your photo size.
Step 2: Cutting Miters
To create a classic frame shape, cut 45-degree miters at each end of the wood pieces. This allows the frame to fit together seamlessly.
Step 3: Assembling the Frame
Use wood glue to join the mitered corners and secure them with clamps until the glue dries. Ensure the frame is square and the corners are tight.
Step 4: Finishing
Sand the frame for a smooth finish and then apply a wood stain or paint to match your decor. Insert your photo, and you have a custom wooden picture frame that adds a personal touch to your cherished memories.
Creating Custom Wooden Signs for Your Home
Custom wooden signs are a wonderful way to infuse your home with personality and convey meaningful messages.
Step 1: Selecting Wood
Choose the type of wood that suits your project. Popular choices include pine, cedar, or reclaimed wood for a rustic look.
Step 2: Design and Message
Plan the design and message for your sign. Consider using stencils to create precise lettering or artwork.
Step 3: Painting and Stenciling
Paint the wooden surface in your chosen color and let it dry. Then, carefully stencil your message or design onto the wood.
Step 4: Distressing and Sealing
To achieve a weathered appearance, lightly distress the wood by sanding the edges. Finish by applying a clear coat or sealant to protect the paint and enhance the sign’s longevity. Your custom wooden sign is now ready to adorn your cozy kitchen or welcoming entryway, making a statement that is uniquely yours.
These DIY wood decor projects offer a blend of creativity and functionality, allowing you to personalize your living spaces with a touch of handmade charm. Whether you’re a novice or a seasoned DIY enthusiast, these projects are accessible, rewarding, and a perfect way to express your creativity.

Step-by-Step Tutorials
Step-by-Step Tutorials
Guided Instructions for Each DIY Wood Decor Project
Here, we provide comprehensive step-by-step tutorials for each of the DIY wood decor projects we’ve introduced earlier. These tutorials are designed to empower you with the knowledge and skills needed to confidently take on your chosen projects. Let’s dive into the guided instructions:
1. Rustic Wooden Shelves: A Perfect DIY Entry Project
Tools and Materials: Gather essential tools such as a saw, measuring tape, screws, and your selected wood. Measure and cut your wood to the desired shelf lengths. Attach brackets to the wall and secure the wooden shelves on top.
2. Transforming Old Pallets into Stylish Furniture
Tools and Materials: Collect old pallets, a saw, sander, wood stain, and a paintbrush. Disassemble the pallets and cut the wood to the right dimensions. Sand the wood surfaces to create a smooth finish, then apply wood stain and paint as desired. Assemble the pieces to craft unique furniture.
3. Crafting Wooden Picture Frames: A Personal Touch to Photos
Tools and Materials: You’ll need wood, a miter saw, wood glue, clamps, and picture frame hardware. Measure and cut wood pieces to your desired frame size, then use wood glue to assemble the frame. Secure the corners with clamps and add picture frame hardware to display your photos.
4. Creating Custom Wooden Signs for Your Home
Tools and Materials: Prepare wood, stencils, paint, and a paintbrush. Cut the wood to the desired sign dimensions and sand the surface. Apply a base coat of paint, let it dry, and stencil your chosen design or message. Finish with a protective clear coat to preserve your sign.
Tips and Tricks for a Professional Finish
Achieving a professional finish is the hallmark of exceptional DIY wood decor. Here are some tips and tricks to enhance the quality of your projects:
- Sanding Techniques: Use different grit sandpapers to smooth wood surfaces. Start with coarse grit and gradually move to finer grits for a polished finish.
- Paint Application: Apply paint evenly using a quality brush or spray paint. Multiple thin coats provide a smoother finish than one thick coat.
- Staining Methods: To achieve the desired stain shade, test on a small wood sample first. Wipe off excess stain for a lighter finish or let it sit longer for a richer color.
- Sealing and Protection: Apply a clear sealant or finish to protect your wood decor from wear and tear. Choose the right finish (e.g., matte or gloss) to match your desired look.
Inspiring Variations and Creative Twists
Creativity knows no bounds in the world of DIY wood decor. Here are some inspiring variations and creative twists to put your personal stamp on your creations:
- Wood Types: Experiment with different wood types like reclaimed barn wood, birch, or cedar for unique textures and colors.
- Design Elements: Add unique design elements such as carvings, inlays, or wood burning to customize your projects further.
- Alternative Finishing: Explore alternative finishing methods like distressed or weathered looks, shou sugi ban (charred wood), or creative paint patterns to give your wood decor a distinct character.
By following these step-by-step tutorials and implementing the provided tips and creative twists, you’ll be well on your way to creating exceptional DIY wood decor that reflects your personal style and craftsmanship.

Showcasing Your DIY Wood Decor
Showcasing Your DIY Wood Decor
Incorporating Your Creations into Different Home Styles
Your DIY wood decor is a versatile addition to any home. It can seamlessly blend into various interior styles, from rustic and farmhouse to modern and minimalist. The key is to understand how your DIY wood creations can complement these specific aesthetics, allowing you to curate a harmonious and well-coordinated home decor.
Rustic and Farmhouse Styles: If you’re going for a rustic or farmhouse look, your DIY wood decor is a perfect match. Wooden furniture and accents resonate with the warm and cozy feel of these styles. Think reclaimed wood coffee tables, distressed wood wall art, or barn wood shelving. The imperfections and natural textures of wood enhance the rustic charm.
Modern and Minimalist Styles: In modern and minimalist interiors, less is more, but that doesn’t mean you can’t incorporate DIY wood decor. Choose sleek, clean-lined wooden pieces that blend with the simplicity of these styles. Consider minimalist wooden bookshelves, streamlined wooden coffee tables, or elegant wooden wall panels. The contrast between wood and other materials creates a visually appealing balance.
The Art of Balancing Wood Elements in Interior Design
Balancing wood elements within your interior design is an essential skill for achieving a cohesive and visually appealing living space. To master this art, you need to consider the textures, tones, and patterns of wood and how they interact with other materials like metal, glass, and fabric.
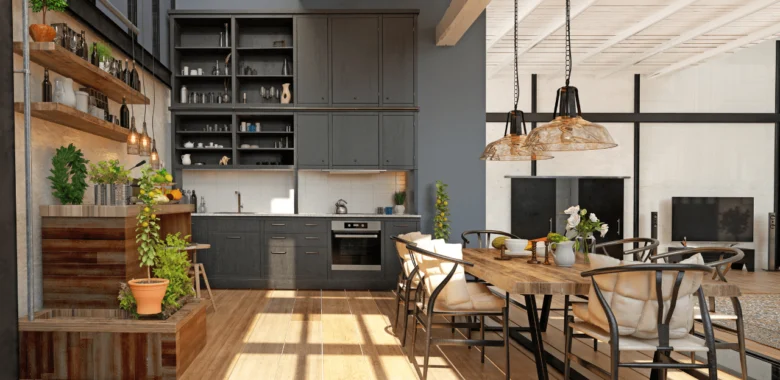
Texture: Wood brings natural textures, and how you combine these textures with other materials is crucial. For instance, pairing a smooth wooden dining table with metal chairs creates an intriguing textural juxtaposition. The interplay between smooth and rough textures adds depth and visual interest to your interior.
Tone: Wood comes in various tones, from light to dark. Balancing wood tones is about creating a harmonious palette. If your flooring is dark wood, you might opt for lighter wood furniture to balance the room. The right balance of tones ensures that one wood element doesn’t overwhelm the space.
Pattern: Wood grains have their own unique patterns. When incorporating wood into your design, consider how these patterns align with other patterns in your decor, such as upholstery or wallpaper. Harmonizing or contrasting wood patterns can enhance the visual appeal.
Sharing Your DIY Journey: Social Media and Personal Blogs
Documenting your DIY wood decor journey is not just a personal endeavor but a story worth sharing. Social media platforms and personal blogs offer powerful ways to showcase your creativity and connect with a community of fellow DIY enthusiasts. Here’s how to get started:
Instagram: Create an Instagram account dedicated to your DIY projects. Share photos of your finished pieces, along with before-and-after shots. Use relevant hashtags like #DIYWoodDecor to reach a broader audience. Engage with your followers by answering questions and providing insights into your creative process.
Pinterest: Pin your DIY wood decor projects on Pinterest boards to inspire others. Pinterest is a treasure trove of ideas, and your creations can become a source of inspiration for users searching for DIY home decor.
Personal Blog: Consider starting a personal blog to detail your DIY wood decor projects in-depth. Share tutorials, tips, and your journey’s ups and downs. A blog allows you to connect with a dedicated readership and showcase your expertise.
YouTube: If you’re comfortable in front of the camera, create DIY tutorial videos for YouTube. Video tutorials are immensely popular, and they provide a visual step-by-step guide for your audience.
Building a community around your passion for DIY wood decor can be incredibly fulfilling. You’ll not only inspire others but also learn from fellow DIY enthusiasts, fostering a supportive and creative online space.
If you’re wondering about laundry choices, be sure to check out our article on Washing Khakis: Lights or Darks? The Ultimate Guide for valuable insights.
Related Reading